Handmade products stand out! A wooden jewelry box is more than just a container. It is a personal treasure that you can make with your own hands. Here is your step-by-step guide to making your very own jewelry box from scratch. We will go through everything, starting from planning to the last finishing touch.

The fundamental skills of woodworking are learned through building a jewelry box. You will be cutting, joining, and finishing woods. The project is fulfilling, and you get a beautiful and useful item.
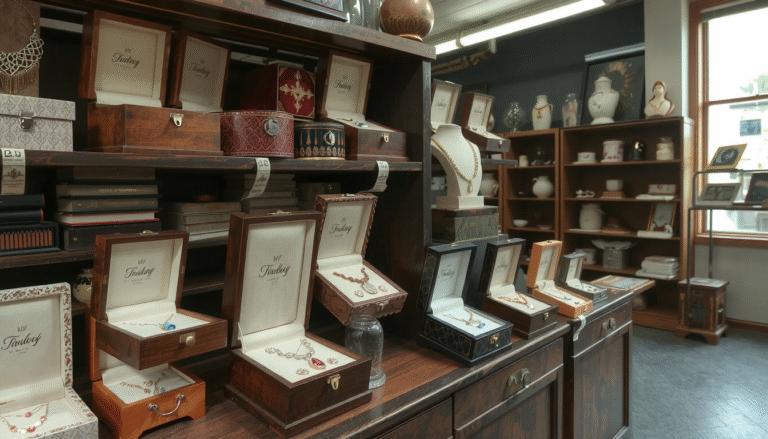
To see designs, check out professional work. Viewing designs from a leading jewelry box manufacturer can be a great inspiration for your own build.
Before You Start: The Process of Planning Your Jewelry Box
Planning is the most crucial step. Designing the box before you start cutting wood prevents you from making mistakes. This section will present you with the best strategies to make a solid plan.
Choosing the Size and Style
First, decide what is going to be inside the box. Are you going to place rings, necklaces, watches, or all these in one box? The size of the box depends on the content. It can also determine if you need small compartments, a tray, or drawers.
Next, choose a style. One of the easiest is a box with a lid that you lift off. A more advanced project would be a box that has drawers or trays in it. However, it is more complex and takes more time.
Sketch your idea on paper. Note down the dimensions (length, width, height) of the box. This will be your guide.
Choosing the Right Wood
Some types of wood will fit beautifully, will be cheaper, or be more difficult to work with. Take a look at this list of good choices for beginners who want to learn how to build a jewelry box.
| Wood | Cost | Ease of Working | Appearance/Grain |
|---|---|---|---|
| Pine | Low | Easy | Light color, visible knots, soft |
| Poplar | Low-Medium | Easy | Light cream/greenish, paints well |
| Oak | Medium | Moderate | Strong grain, classic look, hard |
| Walnut | High | Moderate | Rich dark brown, elegant look |
The best option for starting is poplar. It is a hardwood that is easy to work with. It also finishes nicely.
Learning the Basic Joinery Options
Joinery is the way in which the corner joints of wood are made. The quality of the cutting affects both the look and the strength of the joint.

- Butt Joints: This is the easiest one. You simply glue the square ends together. It is also the weakest joint but it can be fine for a beginner’s practice.
- Miter Joints: These ones are at a 45-degree angle. Their appearance is spot on as the wood grain wraps around the whole corner. This will be our focus.
- Rabbet Joints: Here one piece must have a small step cut. The other piece will fit right into that step. This joint is stronger than a butt joint and still easy.
No matter which joint you choose, it is important that you cut them right. Just as this basic box-making tutorial points out, accuracy in joinery is the most crucial part of achieving a good box project.
Collecting Your Tools and Materials
It is essential to have all necessary tools and materials at hand for stress-free building. Use the following checklist to make sure that you have everything that you need for this DIY jewelry box project.
Essential Tools List
- Safety Gear: You need to always wear safety glasses and a dust mask.
- Measurement and Marking: A tape measure, a combination square, and a sharp pencil or marking knife are the essentials.
- Cutting: A table saw or miter saw is best for accurate miter joints. A hand saw with a miter box is a good low-cost option.
- Assembly: You need quality wood glue and clamps. A band clamp is perfect for boxes. Other clamps will also work.
- Finishing: Sandpaper in several grits (like 120, 180, and 220) is essential. A random orbit sander can speed up sanding.
Materials List (for a 10″x6″x4″ Box)
- Wood: You’ll need one piece of 1-inch by 4-inch board that is 4 feet long. The actual size is usually about ¾ inch thick and 3½ inches wide.
- Top/Bottom: One piece of ¼-inch thick plywood or solid wood will be required. It should be at least 10 inches by 6 inches.
- Hardware: Two small box hinges and a small latch, if you want one.
- Finishing: Your choice of wood finish, like Tung oil or wipe-on polyurethane, and clean rags.
- Lining (Optional): A piece of felt or velvet fabric and spray adhesive.
How to Create a Jewelry Box: The Step-by-Step Process
Can we finally get to the fun part of building the box? We have summed up the process in five simple steps. Stick with the steps and soon you will have a beautiful box.
Step 1: Cutting the Box Sides
First, we will cut the four sides of the box. For the miter joints, set your saw blade to a 45-degree angle.
Carefully measure and cut two long sides (10 inches) and two short sides (6 inches). Don’t forget the woodworker’s rule: “measure twice, cut once.”
To check for alignment settings, you need to make a test cut on a scrap piece first. Nothing can beat the feeling of two mitered corners fitting together perfectly with no gaps.
Step 2: Cutting Grooves for the Top and Bottom

This step builds a strong box and makes it look professional. We will make a small groove, also called a dado, across the inside of all four side pieces. This is for the top and bottom to sit into.
Set your table saw blade to cut about ¼ inch deep. Position your fence so the groove is about ¼ inch from the top and bottom edges. Run each of the four side pieces through the saw to create the grooves.
Step 3: Assembling and Gluing the Box
Before you apply glue, you always do a “dry fit.” Put the box together without glue to make sure all of the pieces fit. Check the fit by sliding in the top and bottom panels into their grooves.
If you are happy with the dry fit, it’s glue time! Spread a thin, even layer of wood glue along the four 45-degree mitered edges.
A trick you can use, as seen in this simple DIY wooden jewelry box plan, is to lay the pieces flat and tape the outside joints. Then you can apply glue and “fold” the box up. This helps keep the corners aligned.
Use a band clamp or corner clamps to hold the box really tightly. A little bit of glue might squeeze out of the joints. Wipe the excess glue away with a damp cloth before it dries. Let the box dry for the time mentioned on the glue bottle, usually a few hours.
Step 4: Cutting the Lid Free
This isn’t magic. Your box without a lid will now become a box with a lid.
Using a square and pencil, mark a straight line all around the box. The best height for the lid will be about ¾ inch from the top edge.
Adjust your table saw fence to this size. Cut the lid from the box along the line you marked. Smooth the newly cut edges with some fine sandpaper.
Step 5: Sanding and Final Assembly
Sanding will make your box feel good. It is recommended that you start with lower grit sandpaper, like 120-grit, to get the tool marks out. Then, use medium 180-grit paper and finish off with the fine 220-grit. Sand the entire box, inside and out.
The last thing to do in construction is to put on the hardware. Take your time to mark spots for hinges exactly. Drill small pilot holes for the screws and attach the hinges to connect the lid to the box. Attach a latch on the front if you’re using one.

Professional Touch: Personalization and Finishing
The last effort turns a simple wooden box into a finished work of art. Covering the wood with a finish will protect it and it will look beautiful.
Choosing and Applying a Finish
There are many kinds of finishes. Here are two super-easy choices for making your own jewelry box.
- Oil Finishes (Tung oil, Danish oil): These oils are very fast and easy to wipe on with a rag. They are absorbed by the wood and bring out its natural color and grain. They provide a natural, low-sheen look.
- Polyurethane: This is a finish that lasts and acts as a plastic film on the wood. It adds more scratch and water resistance. You can find easy-to-use wipe-on versions, too.
To finish, take a clean rag and wipe on a thin coat. It should be left to dry completely. For an even smoother surface, you might want to lightly sand with very fine sandpaper (320-grit or higher) between coats.
How to Line Your Jewelry Box
Lining the inside of the box protects delicate jewelry from scratches. Fabric-wrapped inserts give a nice touch and are a practical method.
First, find the measurements for the inside bottom of your box and any trays. Cut pieces of thin cardboard or poster board that will fit inside snugly.
Next, cut your fabric (felt or velvet works best) about one inch larger than the cardboard on all sides. Use spray adhesive to attach the fabric to one side of the cardboard. Wrap the extra fabric around to the back and glue it down.
Now, you can just drop these inserts into the box. They are removable and give a very clean look. For a truly high-end feel, sourcing quality material from suppliers of velvet jewelry boxes wholesale can make a big difference.
If you find that this process of how to build a jewelry box is more than you wish to take on, you can always explore a wide range of beautiful, professionally crafted options at https://jewelryboxsupplierltd.com/.
Adding Custom Details
This is your chance to make the box truly unique. You could use a wood-burning tool to add a name or initials. You could also add thin strips of a contrasting wood, called splines, into the mitered corners for extra strength and a decorative touch.
For even more inspiration, looking at advanced scroll-sawn jewelry box plans can show you what is possible with more decorative work.
FAQ: Your Jewelry Box Building Questions Answered
Here are answers to some common questions that come up when learning how to build a jewelry box.
What is the best wood for a beginner to build a jewelry box?
Poplar is an excellent choice. It’s an affordable hardwood that is easy to cut, sand, and finish. It also takes paint very well if you want a colored box. Pine is even cheaper but is a softwood. This makes it more prone to dents and scratches.
How do I fix small gaps in my miter joints?
For very small gaps, you can create a filler by mixing fine sawdust from your project with a bit of wood glue. Press this paste into the gap and let it dry completely. Then, sand it smooth. This helps the repair blend in with the surrounding wood.
Do I really need a table saw to build a jewelry box?
No, you do not. A table saw makes cutting precise joints easier. But you can get great results with a quality hand saw and a miter box. A router can also be used to cut the grooves for the top and bottom panels.
What’s the easiest way to install small hinges?
Use a self-centering drill bit, also known as a Vix bit. This special bit ensures your pilot holes are perfectly centered in the hinge’s screw holes. This prevents the hinge from shifting during installation and helps the lid close properly.
How can I add dividers inside the jewelry box?
The simplest way is to cut thin strips of wood (about ¼-inch thick) to the internal height of your box. You can create interlocking slots by cutting halfway through the strips where they will cross. This allows them to slide together to form a grid for organizing small items.