Your jewelry box serves more than just as storage. It is a refuge for your precious jewelry and other collectibles. The soft felt inside which protects your belongings from scratches and tarnishing picks up dust, lint, and makeup smudges. It can even get moldy and smell musty. You probably think cleaning it could harm it.
Relax, you’re on the right track. With the right cleaning liquids and your patience, you can manage to clean the delicate felt inside your jewelry box. You will get everything you need to know on the cleaning of jewelry box felt in this guide. Apart from showing you dusting techniques, we will also walk you through the steps of stain and odor removal without damaging either the fabric or the box.
Before You Begin: Essential Prep for a Safe Clean
 Successful, damage-free cleaning largely depends on proper preparation. Rushing this step is bound to lead to mistakes. Let’s make it our first step.
Step 1: Completely Empty Your Jewelry Box
The very first move should be the careful removal of all the jewelry from the box. It preserves your items from the action of any cleaning agents. Since there are no obstructions, you will have clear access to all parts of the felt lining. Primarily, you could put a clean, soft cloth or a towel on the working table where you can place your jewelry on out of the way.
Step 2: Check the Condition of Felt Lining
Next, with the box empty, take a close look at the felt lining. What do you think is the main issue? Is it just a light dust or lint? Are there stains from make-up, oils, or something else? Or, in fact, is the only problem a musty odor from the felt due to its storage? A good understanding of the main issue makes it easy to choose the right cleaning method and helps get your work done faster.
Step 3: Gather Your Gentle Cleaning Toolkit
Having supplies ready makes the process smooth and efficient. You probably have most of these items at home, anyway.
- For Dust/Lint: Microfiber cloth, a soft-bristled brush (a mushroom brush or new, soft toothbrush works well), a lint roller, or strong packing tape.
- For Stains: Cotton swabs, clean white cloths, mild dye-free dish soap, distilled water, isopropyl alcohol, and white vinegar.
- For Odors: An open container of baking soda or a small pouch of activated charcoal.
- General Tools: A small bowl for mixing solutions and a hand-held vacuum with a soft brush attachment.
The First Pass: Gently Removing Surface Dust and Lint
 In the case of most jewelry boxes, a thorough dusting is all that is required for the restoration of the felt. This is the least harsh step and should always be your starting point. Knowing how to clean the felt inside your jewelry box starts with these simple, effective techniques.
The Soft Brush & Lint Roller Method
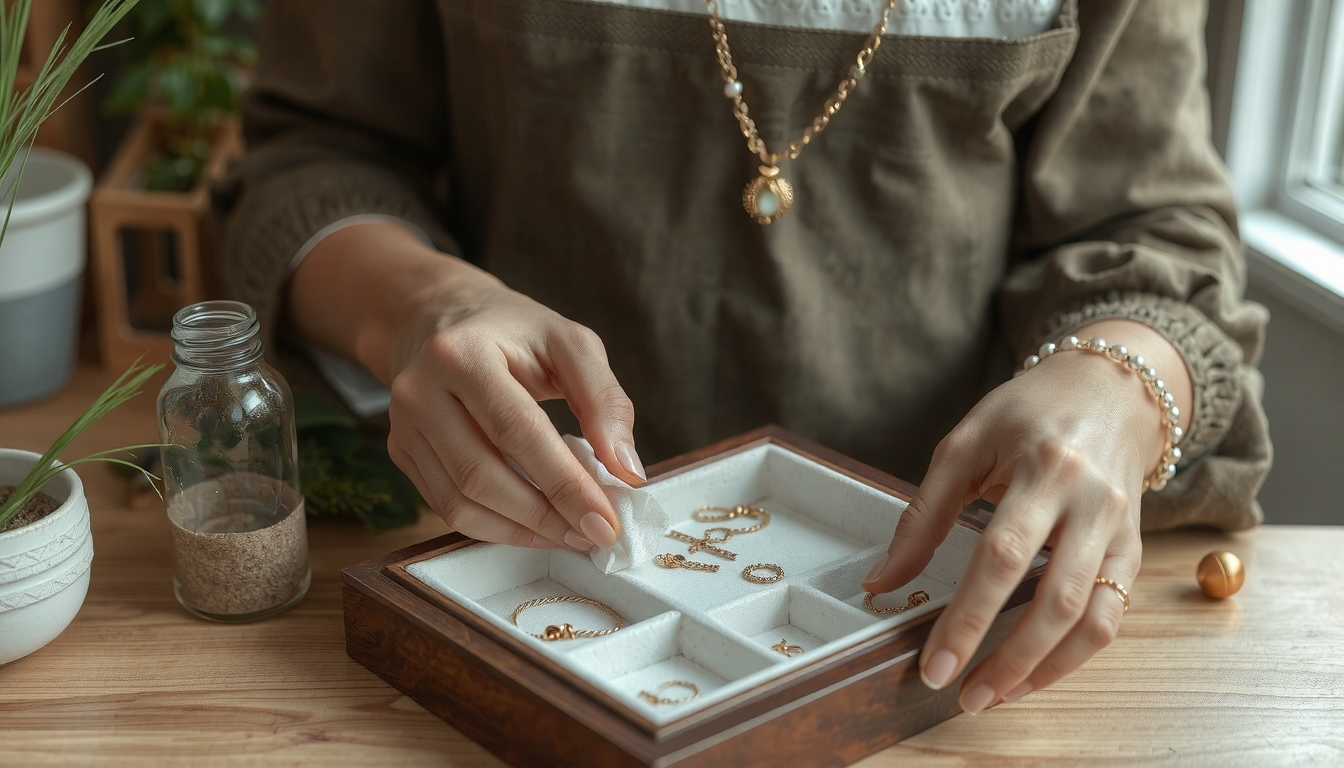
Use a soft-bristled brush to sweep the felt from the corners and crevices toward the center of each compartment. Try not to scrub the fabric; your aim is lifting and loosening the debris only. After the debris is lifted up, pick up all the dust, hair, and fibers by running the lint roller over the whole surface.
Using a Vacuum Cleaner Safely
Using a hand-held vacuum cleaner or a regular vacuum that has a soft brush attachment is the ideal option. Always remember to use the lowest suction power possible. With the soft brush tool attached, you can run it across the felt lightly. It is a good method to clean tight spaces, but you have to remember to be gentle so that the fibers do not get pulled or stretched out.

The Tape Trick for Stubborn Fibers
In cases where lint or pet hair is deeply embedded into the fibers, this is what you need: packing tape. Put a piece of tape on the lint or hair, and then remove it. You will be surprised at what it takes away.
In my experience, I get the most satisfaction when the tape makes that perfect little “rip” sound as it releases the stubborn fibers. Always be gentle. The first point of concern should be testing this approach on an unexposed area first to ensure your felt’s adhesive is secure.
Advanced Stain Removal: A Targeted Approach
Tackling stains one by one is the way to go when dust removal isn’t enough. Focusing on spots in felt necessitates a gentle, targeted method. Moving beyond general guidance is what it takes to take good care of the felt lining of a jewelry box.
The Golden Rules of Felt Stain Removal
Remember these four rules before you go on. They represent the basis of safe and effective management.
- Always test your cleaning solution on a hidden area. Consider testing it inside a ring slot or under a removable tray.
- Always dab the stain. Never rub. Rubbing can push the stain deeper into the fibers and cause the felt to pill or fray.
- Work from the outside edge of the stain inward. This way, the stain is prevented from spreading.
- Use only the smallest possible amount of liquid. Soaking the felt can cause the board underneath to become damaged and the glue to weaken.
Your Stain-Fighting Reference Table
Different stains need different solutions. Use this table to find the best method for your specific problem.
| Stain Type | Recommended Solution | Method |
|---|---|---|
| Makeup (Powder) | Isopropyl Alcohol | Lightly dampen a cotton swab with 70% isopropyl alcohol. Gently dab at the powder stain, using a fresh part of the swab for each dab to lift the pigment away. |
| Oily/Greasy Spots | Mild Soap Solution | Mix 2-3 drops of clear, mild dish soap into a small bowl of warm distilled water. Dampen a clean, white cloth in the suds (not the water), and gently dab the oily spot. |
| Ink Marks | Isopropyl Alcohol | This is a delicate operation. Dampen a cotton swab with alcohol and press it directly onto the ink mark without wiping. Use a fresh swab for each press to avoid spreading the ink. |
| Tarnish Residue | Mild Soap Solution | The dark, smudgy residue left by tarnished silver is often on the surface. Use the mild soap solution method to gently lift it from the felt fibers. |
| Sticky Residue | Coconut Oil & Soap | For sticky spots from tape or labels, some professional cleaning guides suggest a unique approach. Rub a tiny amount of coconut oil on the residue to break it down, then use the mild soap solution to clean the oil away. |
Removing Musty Odors & Preventing Future Issues
It is not always what is seen that must be covered; sometimes it is what is smelled. A musty odor in a vintage or poorly stored box is common. Below is how to remove the odors from the felt lining and how to ensure the smell doesn’t come back.
Safe Deodorizing Techniques for Felt
The first and foremost rule is that you should never spray perfume, air freshener, or any scented liquid right on the felt. This is going to lead to staining and will only mask the odor for a short time. Instead, you should opt for absorption.
- Baking Soda: Just put a small, open container of baking soda inside your jewelry box. Close the lid and let it sit for a day or two. Musty smells will be absorbed by the baking soda.
- Activated Charcoal: A little bag of activated charcoal (sold as an odor absorber) is a veritable rescuer. Place one in the closed box and leave it for a few days.
- Dry Coffee Grounds: For earthy or smoky odors, a small dish of unused, dry coffee grounds can be very effective. Just make sure they are in a container so they don’t spill.
Long-Term Prevention: Keeping Your Box Fresh
Once you’ve learned how to clean your jewelry box felt, keeping it fresh is simple.
- Always make sure your jewelry is completely clean and dry before putting it away.
- Store your jewelry box in a dry, climate-controlled part of your home, away from humid bathrooms or damp basements.
- For added protection in humid climates, place a small silica gel packet (like those found in new shoe boxes) inside to absorb moisture.
- If you find these issues are continuing, it might be time to consider an upgrade. Looking at options from a dedicated jewelry box supplier can lead you to a modern box designed with better, moisture-resistant materials, avoiding such issues from the very beginning.

The Final Touch: Proper Drying and Aftercare
After any wet cleaning, proper drying is a very important final step. If you handle this stage wrong, you can ruin all your hard work by making the felt warp or even grow mildew.
Why Air-Drying is Non-Negotiable
Never use a hairdryer, radiator, or direct sunlight to speed up drying. Felt is a non-woven fabric, often containing wool or synthetic fibers. Heat can cause these fibers to shrink, mat together, and harden, permanently ruining the soft, plush texture you’re trying to preserve.
How to Dry the Felt Correctly
Patience is your best ally. Keep the jewelry box wide open in a well-ventilated room. To improve the air flow, you can aim a small fan at the box, but place it some distance away.
In case you treated a stubborn stain and the area is damper than you would like, you can gently pat it with a clean, dry, color-fast cloth to absorb excess moisture. Before you close the lid or put your jewelry back, make sure the felt is 100% dry to the touch.
Frequently Asked Questions (FAQ)
Is it possible to use water for washing the felt of my jewelry box?
Yes, but be careful. Always use distilled water, as this will eliminate the chances of leaving behind mineral spots from tap water. Apply it with a slightly damp cloth, never by wetting the felt, which can damage the glue and the underlying board, as advised in numerous DIY cleaning guides.
How can I restore felt that has stiffened after cleaning?
When the felt is stiff or hard after it is cleaned, it is usually due to leftover soap or mineral deposits. You can easily re-soften it by gently brushing it with a very soft-bristled brush, like a baby’s hairbrush or a clean mascara wand. This action helps break up the residue and fluff the matted fibers.
Can the felt lining be replaced if it is badly damaged?
Definitely. If the felt is extremely stained, ripped, or irreparably damaged, you can consider replacing it. Peel off the old lining very carefully, trying to take it off all in one piece. You can then use this as a template to cut a new piece from self-adhesive felt sheets, which are widely available at craft and fabric stores.
How often should I clean the felt in my jewelry box?
For general maintenance, a light dusting or vacuuming every few months, or whenever you notice dust buildup, is enough. A deep clean for stains and odors should only be done when needed. Over-cleaning with wet solutions can slowly damage the fabric, so it is better to be targeted and gentle.
Will cleaning the felt harm the wood or the exterior of the box?
It should not harm the wood or the box’s exterior if you are careful. This is precisely the reason why it is crucial to use minimal liquid. Keep a dry cloth close to you so you can wipe any spills or drips on the wood, leather, or any exterior materials immediately to avoid water spots or damage.
Conclusion: Maintaining a Beautiful Home for Your Treasures
Cleaning your jewelry box felt doesn’t have to be scary. By following a gentle, patient, and step-by-step approach, you can quickly and easily restore the lining to a clean and fresh condition. You have taken the time to protect the home of your cherished items, ensuring they remain safe and beautiful for years to come.


