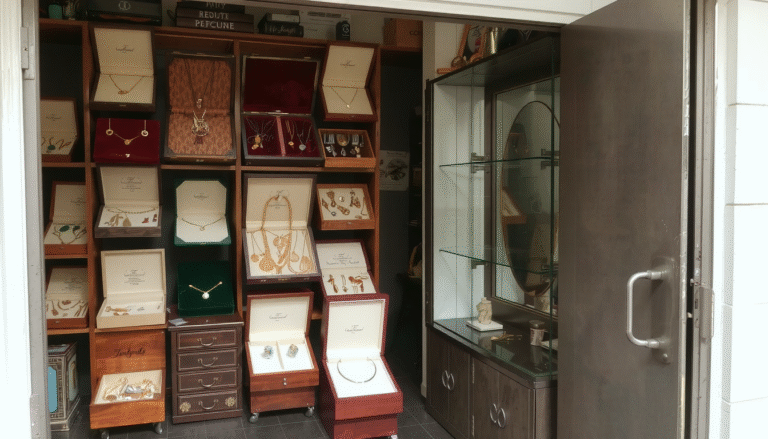
Your jewelry box is special. It might be something you bought recently or an old family treasure. Either way, it’s more than just a place to store things. It’s a home for your most precious items.
Over time, dust builds up. Fingerprints appear. Grime accumulates. This makes your jewelry box look dull and can even damage your jewelry.
Learning how to clean a jewelry box properly is crucial. A clean interior stops your jewelry from tarnishing and getting damaged. A restored exterior brings back the box’s original beauty.
This guide gives you everything you need to know. We’ll walk you through each step. We’ll break down the process by material type—wood, leather, delicate velvet, and glass. This ensures safe and effective restoration.
First Things First: Pre-Cleaning Prep and Essential Supplies
 Good preparation leads to successful cleaning. Before you start, gather your supplies. Set up a clean, well-lit workspace. This helps you avoid mistakes and see every detail clearly.
Step 1: Empty and Inspect
Remove every piece of jewelry from the box carefully. Place items on a soft cloth to prevent scratching. This is a perfect time to check your jewelry. Look for needed repairs, tangles, or pieces that need their own cleaning.
Step 2: Identify Your Jewelry Box Material
Your cleaning method depends on your jewelry box material. Common materials include wood (varnished, painted, or unfinished), leather, velvet or other fabrics, and boxes with metal or glass parts. Identify each material before you begin.
Your Universal Jewelry Box Cleaning Toolkit
You need the right tools to clean a jewelry box properly. The table below shows essential supplies and gentle cleaning solutions for each material type. Always start with the gentlest method first.
| Material Type | Essential Cleaning Supplies | Gentle Cleaning Solution Recipe |
|---|---|---|
| Wood | Microfiber cloths, soft-bristled brush, cotton swabs, wood conditioner/polish. | Mix 1-2 drops of mild dish soap in a bowl of lukewarm water. |
| Velvet/Fabric | Vacuum with brush attachment, lint roller, microfiber cloths. | Mix 1-2 drops of a mild, clear detergent in a bowl of cool water. |
| Leather | Microfiber cloths, dedicated leather cleaner, leather conditioner. | Mix 1-2 drops of mild soap (like Castile or baby shampoo) in a bowl of lukewarm water. |
| Metal/Glass | Microfiber cloths, specific metal polish (e.g., for brass or silver), glass cleaner. | For general cleaning, use the mild dish soap solution. |
The Core Guide: How to Clean a Jewelry Box Based on Its Material
Your box is empty. Your supplies are ready. Now it’s time to deep clean. Follow these material-specific instructions for safe and beautiful results. This is how to clean any jewelry box with confidence.
For Wooden Jewelry Boxes
- Dust Removal: Wipe the entire box with a dry microfiber cloth. Remove loose dust from inside and outside. Use a soft brush or cotton swab for carved details and corners.
- Light Cleaning: For finished wood (varnished or painted), dampen a microfiber cloth with your mild soap solution. Wring it out until almost dry.
- Wipe Gently: Wipe the exterior surfaces. Follow immediately with a clean, dry cloth to remove moisture.
- Condition and Polish: Once completely dry, apply a small amount of quality wood conditioner or polish. Use a clean cloth and follow the product’s directions to restore shine.

For unfinished wood, avoid water completely. Stick to dry dusting or use a specialized raw wood cleaner. Too much moisture is wood’s biggest enemy. It causes wood fibers to swell and can weaken the glue holding the box together. For more expert tips for cleaning old wooden jewelry boxes, always use minimal moisture and dry immediately.
For Velvet or Fabric-Lined Boxes
- Remove Debris: Use a vacuum cleaner with a soft brush attachment on the lowest setting. Pass it gently over the lining to lift dust and lint. A lint roller works well too. Use a light touch.
- Spot-Treat Stains: For spots, create sudsy foam from your mild detergent solution. Apply only the foam to the stain using a clean microfiber cloth.
- Blot, Don’t Rub: Gently blot the stain. Rubbing can crush velvet’s texture and spread the stain. You’ll see the stain lift from the fabric onto your cloth.
- Rinse and Dry: Lightly dampen a new section of cloth with plain water. Blot the area to “rinse” any soap residue. Let the box air dry completely with the lid open.
This delicate process is key for properly cleaning delicate felt linings without causing damage.
For Leather and Faux Leather Boxes
- Dust First: Wipe the entire surface with a dry microfiber cloth.
- Apply Leather Cleaner: Put a small amount of dedicated leather cleaner onto a clean cloth. Don’t put it directly on the box.
- Clean in Sections: Gently wipe the leather in circular motions. This method for how to clean a leather jewelry box ensures even application.
- Condition: After cleaning, apply leather conditioner with a new cloth. This step keeps leather soft and prevents cracks. Buff off any excess.
For Metal or Glass Boxes
- Clean Glass: For glass panels or mirrors, spray glass cleaner onto a microfiber cloth. Wipe for a streak-free finish. Never spray directly onto the box. The cleaner can seep into seams.
- Polish Metal: For tarnished hardware like clasps or decorative accents, use metal polish specific to the material (brass polish, silver polish). Apply a tiny amount with a cotton swab. Be careful not to get it on surrounding wood or fabric.
- Buff to Shine: Use a clean part of the swab or new cloth to buff the metal to a shine.
Beyond the Basics: Troubleshooting Common Issues
Sometimes standard cleaning isn’t enough. Here’s how to tackle persistent problems and truly restore your jewelry box.
How to Remove Musty Smells
If your box has a musty or mildew odor, place an open container of baking soda inside. You can also use a small bag of activated charcoal. Close the lid and leave it for several days. For intensive treatment, air it out in a shady, dry spot outdoors for a few hours.
Tackling Stubborn Stains
Tough stains on fabric linings need a targeted approach. A small amount of rubbing alcohol on a cotton swab can lift ink stains. A paste of baking soda and water may work on other discolorations. Always test any spot treatment on a hidden area first.
Caring for Hardware
Tarnished clasps and stiff hinges make a box feel old. Use metal-specific polish on a cotton swab to carefully clean hardware. For stiff hinges, avoid oily lubricants that can stain. Instead, apply a small amount of dry graphite powder to help them move smoothly.
The “Do Not Do” List: 7 Mistakes That Can Ruin Your Box
Knowing what to avoid is as important as knowing what to do. Avoid these common mistakes to protect your cherished jewelry box.

Mistakes to Avoid for All Boxes
- Don’t use harsh chemical cleaners like bleach or ammonia. These can strip finishes and damage delicate materials.
- Don’t submerge any part of the jewelry box in water. This causes warping, glue failure, and fabric damage.
- Don’t rush the drying process with heat. Let it air dry naturally.
Material-Specific Mistakes
- Don’t use oil-based furniture polishes on painted wood. They can cause yellowing.
- Don’t scrub velvet or satin linings. This destroys their texture.
- Don’t use water or soap-based cleaners on unfinished or raw leather.
- Don’t use abrasive cleaners or rough cloths on plated metals. You can easily scratch through the thin top layer.
Long-Term Care: Keeping Your Jewelry Box Beautiful
 Once your jewelry box is clean, simple habits can keep it looking great for years.
Simple Maintenance Habits
- Do light dusting with a microfiber cloth monthly.
- Store the box away from direct sunlight, which fades wood and fabrics. Also avoid high humidity, which promotes mold and tarnish.
- Always ensure your jewelry is completely clean and dry before returning it to the box. This protects the lining.
- If a cherished box is beyond simple cleaning and repair, or if you’re looking for a modern replacement with enhanced protective features, you can explore high-quality options from a specialized jewelry box supplier.
Frequently Asked Questions about Cleaning a Jewelry Box
Here are quick answers to common questions about maintaining jewelry boxes.
How often should I clean my jewelry box?
Light dusting every month is ideal to prevent buildup. A deep clean, as detailed in this guide, can be done once or twice a year. Do it more often if needed depending on its condition and environment.
What’s the safest all-purpose cleaner for a jewelry box if I’m unsure of the material?
There is no single “all-purpose” cleaner that’s safe for every material. The safest first step for any box is dry cleaning. Use a soft, dry microfiber cloth or vacuum with brush attachment to remove loose dust and debris. For wet cleaning, you must identify the material first to avoid damage.
Can I use a hairdryer to speed up the drying process?
We strongly advise against it. Concentrated heat from a hairdryer can warp wood, damage glue, shrink leather, and even melt delicate fabric fibers. Air drying in a well-ventilated area away from direct sunlight is always the safest and most effective method.
My vintage jewelry box has a broken mirror. How do I clean around it?
Use extreme caution and wear protective gloves to avoid cuts. If possible, have a professional remove the broken pieces. If not, avoid applying liquid near the cracked area. Moisture can seep behind the glass and damage the box’s structure. Clean the remaining glass carefully with a cloth lightly dampened with glass cleaner. Don’t spray directly.
The velvet lining is completely worn out. Can it be replaced?
Yes, for those comfortable with DIY projects, relining a jewelry box gives it new life. You can buy self-adhesive velvet liner sheets from most craft stores. The process involves carefully removing the old lining, thoroughly cleaning the base surface, cutting the new liner precisely to size, and applying it smoothly to avoid bubbles.