Introduction

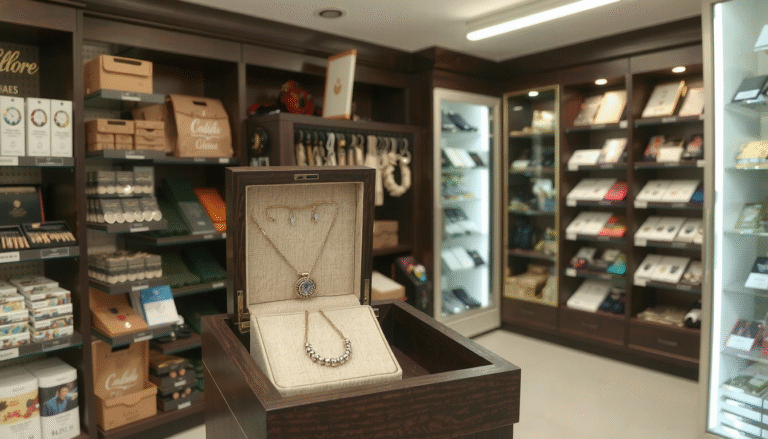
There’s nothing quite like the feeling of constructing something tangible. A wooden jewelry box is an amazing project idea to realize. It serves as both a beautiful home for your jewelry and a work of art in itself. You may decide to offer it as a present or simply keep it as your own.
It is with this guide that you get the full demonstration of the entire process. We lead you from material selection to applying the last coat. Everything you learn from this guide is just what you need.
Ikea’s step-by-step system for a beginner working with wood is straightforward. By the way, we also offer tips for those who are more advanced in woodworking. Now, let’s kick off to the journey of learning wood jewelry box making.
H2: Step 1: Designing the Perfect Jewelry Box
Finalizing the Design and Dimensions
Proper planning creates the foundation for excellent projects. First of all, you need to decide what the box will be used for. Who will use it? What will be placed inside? For example, a rings box takes less space compared to a necklace one.
Next, make a rough drawing on paper. There is no need to impress anyone. Just depict the shape of the box. Record the measurements – length, width, and height – of the box that you desire. This will make it easier to visualize the project before you make any cuts.
Selecting the Right Wood
The wood type you select will not only alter the appearance but also the price. Moreover, it will either facilitate or make the task difficult. Some wood types are more suitable for a DIY wooden jewelry box project than others.
Look at the guide below listing the most frequently used wood types:
Table: Wood Selection Guide
| Wood | Cost | Ease of Working | Grain/Appearance | Notes |
| :— | :— | :— | :— | :— |
| Pine | Low | Very Easy | Light color, visible knots | Great for practice, soft and can dent easily. |
| Poplar | Low-Medium | Easy | Light cream, faint grain | Excellent for painted boxes. |
| Oak | Medium | Medium | Strong, traditional grain | Durable and classic, but can splinter. |
| Walnut | High | Medium-Hard | Rich, dark, beautiful grain | Creates a premium, heirloom-quality look. |
The Janka hardness scale is used to measure the durability of different wood types. So, the higher the score the more resistance to dents. In this regard, Oak is better than Pine because its Janka rating is also higher.
Compiling Your Cut List
The cut list is something which reflects the design on paper and the material you need as well. It contains a unique list of wood parts to use and their designated measurements.
The regular box will require four sides, the top piece, and one bottom piece. For each piece write down the length and width of the wood that you need. A handy cut list helps for a precise assembly of the entire product. For some free jewelry box ideas, you may visit the sprucrafts.com.
H2: Step 2: Preparing Your Tools and Materials
Before you actually start working, it’s paramount to prepare everything. This way, you will keep the workflow steady. Not having the needed tools can cost you both time and money and result in errors.
Core Tools

- Measuring & Marking: A tape measure, square, and a sharp pencil.
- Cutting:
- Hand Saw (a miter box saw works great for straight angles)
- Table Saw or Miter Saw (for faster, cleaner cuts)
- Assembly: Wood glue, clamps (band clamp or several F-clamps).
- Finishing: A sander (orbital or simple sanding block), and sandpaper (120, 180, and 220 grits).
- Safety Gear: Safety glasses and dust mask are required.
Materials List
- The wood of your choice (1×4 or 1×6 boards work well to start).
- A thin plywood sheet (1/4 inch thick) for the box bottom.
- A good wood glue.
- Hardware: Small hinges and a latch or clasp (if wanted).
- Finishing supplies: Wood stain, polyurethane, or oil finish like Danish oil.
- Lining material: Felt or velvet (if desired).
H2: Step 3: The Build – Putting Together the Box
This is when your imagination becomes reality. We will take you through every step of the construction process of the box. Adhering to these steps will be pivotal in your acquisition of the know-how needed to make a jewelry box from wood.
Making the Cuts
Keep in mind this one thing: “measure twice, cut once.” Make use of the cut list and accurately mark the pieces of wood.
The miter joint, which employs 45-degree angles, looks great because the grain can wrap around the corners. So, take your time and don’t rush to make the cuts.
Cutting the Slots for the Bottom Panel
To secure the bottom panel, we will cut a groove in which to insert it. This groove runs along the inside of the four side pieces.
You can use either a table saw or a router for this cut. The groove should be about 1/4 of an inch deep, and wide enough to allow your plywood base to slide in smoothly.
The Dry-Fit and Glue-Ups
Prior to gluing, do yourself a favor and dry-fit the whole thing. Assemble the box and check that each joint and corner is square without glue first. This is the final opportunity to fix any cutting errors.
For gluing, try out the so-called “tape method.” Lay your four side pieces end to end, flat on the table. The outside faces should face down. Run painter’s tape over the joints. Flip the pieces over. Apply the thin wood glue to the angled edges. Then “fold” the box. The tape keeps the corners secure.
For closing the last corner, don’t forget to put the plywood bottom into the grooves first. Then just take a band clamp or F-clamps at each corner, and secure all in place. Clean any extra glue with a damp cloth before it dries.
Cutting the Lid Off the Box
This little secret is a game changer. After the glue holding your box is completely dry, you will separate the lid from the body of the box.
Mark an outline about 1 inch from the top edge around the box. Use a table saw or hand saw with fine teeth to cut along this line carefully. This technique matches the wood grain on both yap and the box. Just like in this simple DIY wooden jewelry box design, the result is a seamless and professional looking box.

Achieving a Flawless Finish with Sanding
Correctly done sanding is the holy grail that turns out a good job into excellently done work. Start with a low grit (120-grit) sandpaper that will erase all tool marks and create a level surface.
Next, go through the grits in ascending order. Transition from 120-grit to 180-grit before finishing with 220-grit. This approach removes smaller scratches even after each application’s multiple applications. Then you will have the wood surface feeling smooth.
H2: Step 4: Finishing & Personalization: Adding Your Unique Touch
This step will turn your ordinary wooden box into a unique object. Now we will give it all the protection, beauty, and features that make it special.
The Finishing Coats
A finish coats not only functions as the wood protector but also enhances its visual properties. There are several good systems for a DIY wooden jewelry box.
Oil-based finishes such as Danish or Tung oils are a breeze to apply. You simply swipe them on, wait, and wipe off the excess. The best part comes when you see the wood grain after curing with the oil, all of a sudden it becomes more colorful.
Another way to begin is with stain, which changes the color of the wood. There’s the option to add polyurethane for a top coat that’s thick and tough. Polyurethane is available in gloss, satin, or matte finishes.
Adding Hardware
Additionally, hardware is not just for function, but style too. For a professional flair, fit small box hinges so they are flush with the wood. This will require the cutting of a shallow recess for every hinge leaf.
Mark the hinge with a knife very carefully. After that, take a sharp chisels to pluck out layers of the wood very slowly. Go for the pattern from the hinge for the wood selection. You can also add a decorative clasp or small lid lift.
Interior Lining for a Touch of Luxury
Fabric lining is a brilliant way to give your box a finished and high-end feel. It’s also for jewelry protection from getting scratched.
A quick and easy way is to cut a thin cardstock or plywood to fit the bottom and sides. First, wrap the pieces in felt or velvet and then secure it using spray glue. The final step will be covering the base with the wrapped panels. Hence, it will have a clean, professional look. For colors and textures, you can see examples from vendors of velvet jewelry boxes wholesale.
Suggestions for Customization
- Wood Burning: Utilize a wood-burning tool to include initials, names, or designs.
- Simple Inlay: Add a pre-made inlay strip as a decorative border.
- Custom Dividers: Make simple cross-dividers from thin wood. They arrange the interior for rings and earrings.
H2: Joinery Demystified: Techniques for Every Skill Level

Joinery is the way that you will be able to attach the woodpieces. The kind of technique you choose to use will influence the strength and appearance of the box. Here are the usual kinds of joints in box making.
Table: Jewelry Box Joinery Options
| Joint Type | Skill Level | Required Tools | Strength | Appearance |
| :— | :— | :— | :— | :— |
| Butt Joint | Beginner | Basic Saw, Glue | Low | Simple, visible end grain |
| Miter Joint | Beginner-Intermediate | Miter Saw/Box, Glue | Medium | Clean, “waterfall” grain |
| Box Joint | Intermediate | Table Saw with Jig | High | Strong, decorative, finger-like |
| Dovetail Joint | Advanced | Hand Saws & Chisels or Router Jig | Very High | Beautiful, interlocking, classic |
As you are not going to be making complicated joints such as that, there is no need to worry. A miter joint created with good quality is sufficient and as described in our guide. Even simple miter cuts, when done with care, create a beautiful and professional-looking box. It is strong enough for this project.
H2: Inspiration and Alternatives: What to Do When You Cannot DIY
Knowing how to create a wooden jewelry box is truly rewarding. It does, however, require time and resources. If you are time and tool constrained, then looking at professional models can be a good alternative.
Buying kits or just pieces of high-quality jewelry boxes from a reputable manufacturing company will be correct way to find your way into future projects. You will be able to learn about different constructions, hinges and finishes. You can view the largest selection of designs in a dedicated supplier like Jewelry Box Supplier Ltd..
H2: Conclusion
Well done! You are now equipped with the skills to design, build, and give a stylish wooden jewelry box. You have mastered the art of wood selection, making exact joints, and finishing like a pro.
That you have created something that you can cherish yourself born of your own hand, is the querulous conclusion. The book on how to make a jewelry box from wood was the perfect guide to inspire you in your creating!
H2: Frequently Asked Questions (FAQ)
H3: What is the best wood for a beginner making a jewelry box?
The best woods for first-timers are Pine or Poplar. They are abundant, soft, and easy to use. If you intend painting the box, Poplar particularly is excellent. It is smooth and has thick tight-grained wood.
H3: How can I make dividers for the inside of the box?
The simplest way to do that is to cut thin strips of the same wood you used for the box. Measure the inside height and length of your box. Cut two pieces that can intersect. Do this by cutting a small slot halfway through the middle of each piece. This lets them slide together to form a cross.
H3: Do I need expensive power tools to make a jewelry box?
Absolutely not. You can craft an attractive jewelry box with just a hand tool’s set. A hand saw with a miter box for the correct angles, clamps, and sandpaper remain necessary. But, it is the power tools that promote the fast pace of a DIY wooden jewelry box project.
H4: How do I get a perfectly smooth, professional-looking finish?
The key to achieving that smooth, professional finish is in the sanding. First of all, do not skip any grits. Your starting point has to be 120-grit, which is aimed at leveling the surface. Move to 180-grit to remove the scratches from the 120. End with 220-grit for a smooth feel. After the first finish application, make a light sand with 320-grit paper. This will bring down any grains that are raised. Finally, put on your final coats.
H5: How do I keep the wood from splitting when I attach hinges?
You must always pre-drill the screw pilot hole. The pilot hole needs to be slightly smaller than the screw’s diameter. This way, the screw threads grip without forcing the adhesive threads apart. Thus, only when the wood splits, causes this to happen. It is really stressed when you are working on the edges of your wood.