Introduction: Make an Unforgettable Gift!

Creating a hand-made wood jewelry box is a project that you will be proud of. It is not just a simple project—it is a way of making a gift that will be cherished. It is also a safe place to store your things. When you finish one, you get the satisfaction of sharing.
This guide will be your companion every step of the way. We are going to discuss everything that you need to do, from choosing the type of wood to putting on the final varnish. Then we will give you an easy to follow guide on how to build a wooden jewelry box that is both attractive and functional.
Even if you are just starting with woodworking, you should not worry. This is an ideal beginner’s project for those with just basic skills. We will walk you through the whole process. In the end, you will have created a work of art that you can flaunt.
Starting Text: Thinking to Build a Box
The secret of a perfect project is good planning. It is of utmost importance to take some time now and think about how you want your design to be in order to avoid mistakes later. The making of a wooden jewelry box is truly a pivotal moment in planning. Let’s plan your perfect box together.
Your Size and Design Options
To begin with, consider the contents your box will have. Will it hold small things like rings and earrings? Or is it going to be for larger things such as watches and necklaces? The contents will help you decide about the correct size.
The followings are some sizes you might start with:
* Small Box: 6 inches long and 4 inches wide; 3 inches tall. A perfect space for rings.
* Medium Box: 9 inches long and 6 inches wide; 4 inches tall. Right for a variety of items.
* Large Box: 12 inches long and 8 inches wide; 5 inches tall. Most appropriate for larger collections.
Then you can think about different types of lids. A simple lift-off lid is the easiest to make. A classic choice is a hinged lid, which is also a nice next step. In this guide, we will focus on a hinged lid. You can find other ideas by exploring various free jewelry box plans that you can use for inspiration.
Selecting the Right Wood
The wood you decide on will determine the box’s aesthetics. It is also an important factor when considering the box’s construction difficulty. Some wood types are softer and snip more easily while others are harder but more durable.
For you, here is a dimple chart for your choice among the most popular types of wood for making jewelry boxes.
| Wood Type | Appearance (Color/Grain) | Workability | Approx. Cost |
|---|---|---|---|
| Walnut | Dark, rich brown color with vertically straight grain. | Easy | $$ |
| Maple | Light, creamy white color. An ultra-modern look. | Medium | $$ |
| Cherry | Warm, reddish-brown that beautifully ages. | Easy | $$$ |
| Pine | Light-yellow with knots; extremely cheap and soft. | Very Easy | $ |
For a first project, Walnut or Cherry are the most recommended options. They have a luxurious look, and they are not hard to use during the building process.

Deciding on Joinery
Joinery is the way you connect the box corners. In this guide, we will use mitered corners. What that means is to cut the ends of each side at a 45-degree angle. When they go together, the wood grain makes a smooth flow around the corner. So, it looks very clean and professional.
There are also other possibilities. Butt joints are less complicated but lack the nice finish. Dovetail joints are very sturdy and beautiful but are more complicated. Mitered corners are an effective way to achieve a successful result and are easily accomplished when using the correct tools.
Gathering Your Tools and Material
Getting everything in place before you start will make the whole process easier and fun. Here is a clear checklist of what you will need.
Essential Tools List
- Safety First: Wearing safety glasses and hearing protections is very essential.
- Measuring & Marking: Tape measure, pencil, and a combination square.
- Cutting: A miter saw or table saw is necessary for accurate miter cuts.
- Assembly: Wood glue and clamps. A band clamp is excellent for the boxes. Other clamps will also do the job.
- Finishing: Sandpaper of various grits (120, 180, 220) and absorptive tack cloth for removing dust.
Materials and Hardware List
- Wood: A 1×4 board that is 4 feet long is a perfect place to start.
- Bottom/Top Panel: A piece of 1/4-inch thick plywood or a thin panel of a contrasting wood.
- Hardware: Two small box hinges and the small screws that come with them.
- Finishing: Your choice of finish. Danish oil, wipe-on polyurethane, or paste wax are all good choices.
- Lining (Optional): A piece of felt or velvet and some spray adhesive.
Steps to Follow: How to Build a Wooden Jewelry Box
Now we arrive at the fun part which is to start building the box. We will tell you how to make a wooden jewelry box in five easy steps. Move along with us and do not hesitate to ask if anything is unclear.
Step 1: Cut Your Pieces
This is the step where precision is paramount. Your first goal is to cut four sides for the box. Every side should have a 45-degree miter on both ends.
The secret is to use a “stop block” on your saw. Clamp a scrap piece of wood to your saw’s fence. You can then make four identical side cuts without measuring each time. This is the necessary step to making a perfect square box.

Afterward, cut the top and bottom panels. They should fit very nicely inside the box. A lot of woodworkers will cut a thin groove on the inside of the box walls called a dado. The panels will be placed in this groove. For this simple box, you can just glue the panels later.
Step 2: Assemble the Box Body
Before you join the parts with glue, first do a dry fit. Just put the four parts together without glue. Make sure that all the corners are aligned perfectly. In case there are any gaps, you may have to adjust your saw angle a little bit.
Once the fit is good, you can apply the glue. An excellent method is to lay the four side pieces out flat, end to end, with the outside faces up. Place painter’s tape across each joint. Flip the pieces and apply a thin coat of wood glue to each mitered edge. Then just “fold” the box into its proper shape. The tape will hold the corners together.
Secure the box with a band clamp or corner clamps. Wipe up any excess glue that comes out with a damp cloth. Most wood glue needs about 24 hours to fully cure. However, the box can frequently be managed after an hour or two.
Step 3: Cut Off the Lid
This step might seem a little bit scary. However, it is actually very simple. What you will do now is cut the main-body piece and the lid from the glued-up box.
At first, set the height of your table saw blade to be just slightly taller than the thickness of the box wall. You want it to cut the wood without cutting too much. We will make the cut roughly 1 inch down from the top edge.
For a clean and safe process, you need to learn how to safely saw off the lid. Cut on two opposite sides first. After making the second cut, I like to use painter’s tape to hold the lid in place. This will avoid the lid moving out of place during the final two cuts. This will give you a cleaner result. Then, carefully flip over the box and cut the remaining two sides which will give you a box and a matching lid.
Step 4: Sand for a Smooth Finish
An effective sanding job is the main difference between a rough and a luxuriously smooth box. It will take a hoard to make it a nice box to touch. We will be sanding in stages.
Start with medium grit sandpaper, say around 120 grit. This should make any saw marks disappear and achieve an even surface. Then move to 180 grit for refining the surface. In the end, use 220 grit sandpaper, which is very fine, in order to get a silky smooth finish. Remember to always sand along the grain of the wood. Also, make sure to sand the box before you put on the hardware.
Step 5: Hinges and Hardware Installation
Adding the hinges is the last step in the construction process. Put the lid on the box and measure where you want the hinges to go.

For a professional effect, the hinges need to be flush to the wood. This can be obtained by cutting a shallow recess. This is called a mortise. You can be careful by using a sharp chisel or a router. Trace the hinge, then proceed slowly removing thin sections of wood until the hinge rests flat.
A tip you can use is to remember always to drill small pilot holes before the hinge screws. This will avoid the little screws from splitting the delicate wood.
Adding Professional Finishing Touches
With the box constructed, it is time to add the finishing touches that will make this item truly special. These are the little details that take your project from a simple box to a finished piece that can be passed on to posterity.
Applying the Right Finish
A finish not only protects the wood but also reveals its beauty. Here are some options that are easy to apply that you can consider for a handmade wooden jewelry box:
- Danish Oil: This is a very easy way to apply finish. Just wipe it on and wipe off any excess. This gives your wood a rich, natural look but lower protection than other finishes.
- Wipe-On Polyurethane: This offers more durable protection against scratches and moisture. It is applied with a rag, so you avoid brush marks. It is the best choice for novice users.
- Paste Wax: This kind of wax creates a soft and smooth feel. It is mostly recommended as the last coat over another finish like oil or shellac.
Wipe-on poly is applied by simply using a clean, soft cloth to put on a thin coat of the wood. After it dries, just sand it with very fine paper (like 400 grit) before you put on the second coat.
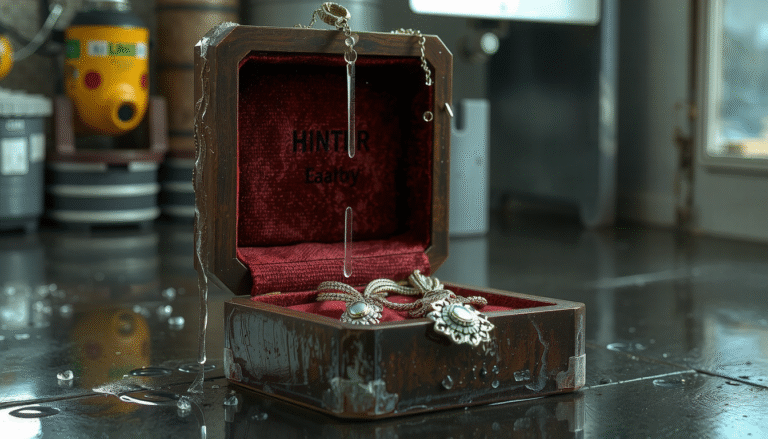
Lining Your Box
The luxury of a lined box is twofold. It not only protects delicate jewelry but also shows a touch of extravagance. Felt or velvet fabric is a classic choice. A simple way to add a custom lining is given below.
- Cut small cardboard pieces that will fit inside and along the sides of your box. They should be slightly smaller so that they can fit easily.
- Cut the fabric about one inch larger than the cardboard pieces on all sides.
- Use a spray adhesive on the cardboard. Carefully wrap the fabric around it. Fold the edges over neatly like you are wrapping a present.
- Once the glue has dried, just push the fabric-covered inserts inside the box. They should fit perfectly without needing glue.
For those looking for high-end options, you can find beautiful materials and ideas by looking at velvet jewelry boxes wholesale. This can provide inspiration for a truly premium feel.
In Case DIY Options Are Not Available
Though making your own box is a fun-filled project sometimes, it is not the best option. Shortage of time, for instance, is one reason to choose buying many identical boxes for a business or special occasion. DIY may not be feasible.
In such cases, partnerships with professional jewelry box manufacturers are a much better way to go. They have both the tools and the experience to create consistent, superior quality, and often complex designs. If you are interested in what professional manufacturing can achieve, you can view pictures of different products that have been finished at https://jewelryboxsupplierltd.com/.
FAQ: Your Questions on Making a Wooden Jewelry Box
These are typical responses to the questions that most beginners have when they learn to make wooden jewelry boxes.
What is the best wood for a beginner making a jewelry box?
A: The best woods are Walnut or Cherry. They are relatively soft, easier to cut and sand, and they also have a great grain for a simple oil finish that would give a professional look with minimal effort.
Can I make a wooden jewelry box without a table saw?
A: Sure! You are able to use just a good miter saw to do all the miter cuts. For separating the box’s lid, a hand saw that has fine teeth or a band saw will be quite as good. Just keep in mind that this method might take a little more sanding to finish the cut edge.
How long does it take to make a simple jewelry box?
A: For a beginner, the best plan is to set aside one entire weekend for it. This will give you enough time to cut the pieces and let the glue dry overnight. You can then make the finishing touches without being in a hurry.
What is the hardest part of making a wooden jewelry box?
A: The most difficult step for most beginners is cutting the lid off the assembled box. The key is to just take it easy, use a sharp blade, and guarantee that the box is held firmly through the cut. Using tape to hold the lid in place for the final cuts helps a lot.
How can I add dividers inside the box?
A: You can just cut thin strips of wood in the exact width that you need to create them.